前言

简单概括下这股跨平台开发的清流:Google出品,Dart语言,FlutterEngine引擎,响应式设计模式,原生渲染。Flutter开发是目前跨平台技术中性能最优,热重载最丝滑,Google大厂也在Flutter中文网中为iOS、Android开发者迁移到Flutter作了文档,怀着想装比的心入坑了,弄明白了知乎所以,接下来当然是制定属于自己的学习计划~(≧▽≦)/~万事俱备只欠东风~
作为一个iOSer,我先从Flutter For iOSer中触类旁通Flutter的一些概念,然后根据Flutter中文网的目录一步步实战应用-(


环境搭建

根据文档搭建Flutter开发环境 · 《Flutter实战》,搭建完成终端检验为下图所示。
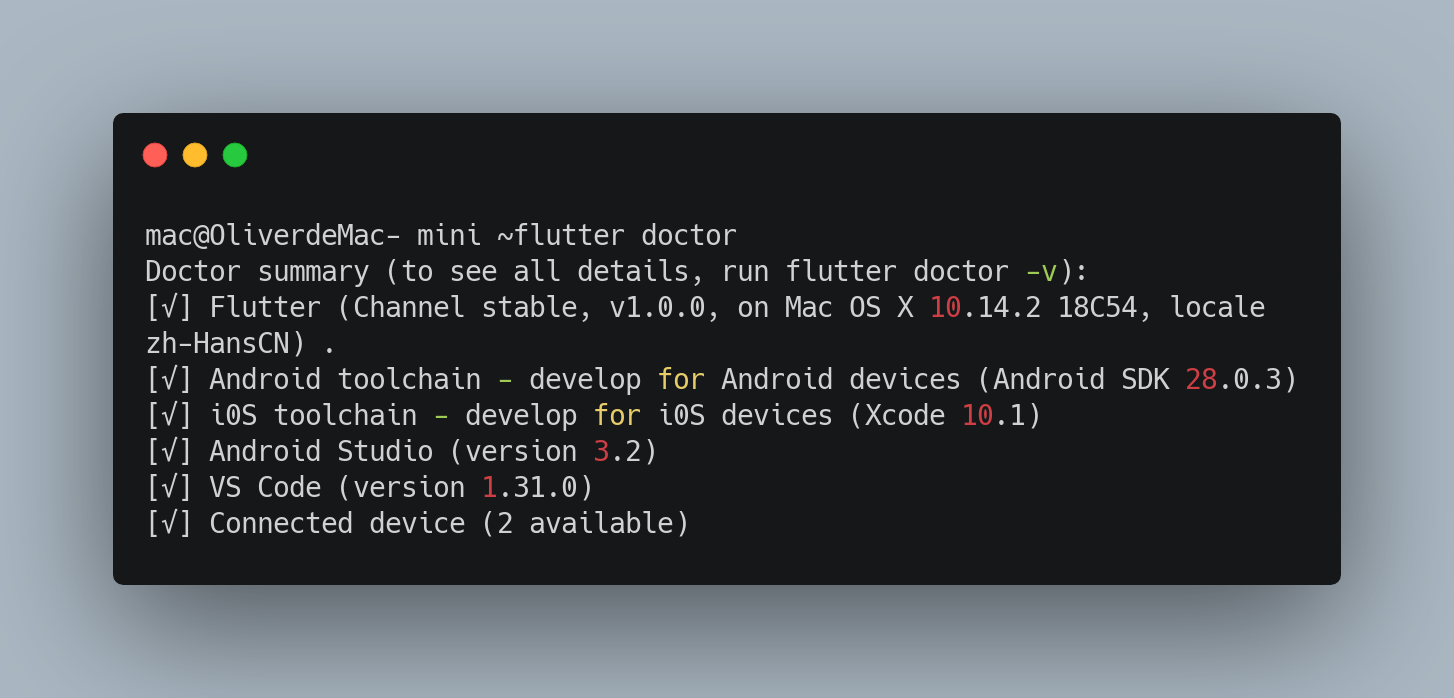
flutter_doctor


框架结构

Flutter框架结构分为Framework和Engine,而我们主要基于Framework开发,从图中可以了解,Flutter通过Engine绘制Widget,Dart代码通过AOT编译为原生代码。
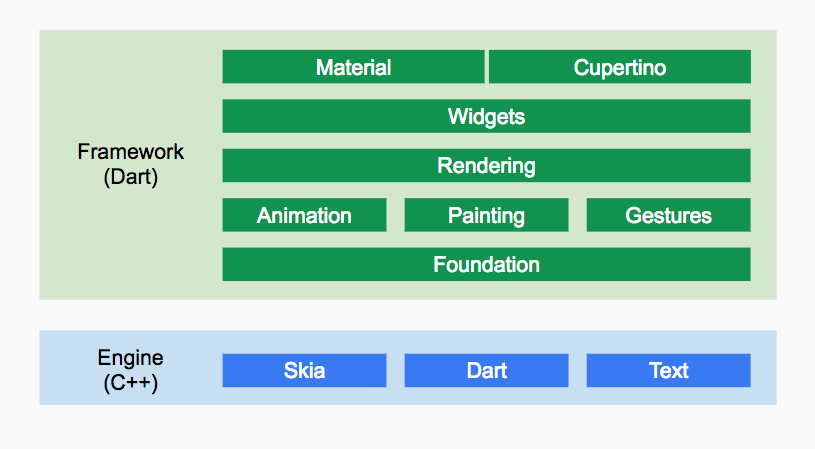
framework


实战DEMO

**lib/main.dart** 文档实战Demo
1
2
3
4
5
6
7
8
9
10
11
12
13
14
15
16
17
18
19
20
21
22
23
24
25
26
27
28
29
30
31
32
33
34
35
36
37
38
39
40
41
42
43
44
45
46
47
48
49
50
51
52
53
54
55
56
57
58
59
60
61
62
63
64
65
66
67
68
69
70
71
72
73
74
75
76
77
78
79
80
81
82
83
84
85
86
87
88
89
90
91
92
93
94
95
96
97
98
99
100
101
102
103
104
105
106
107
108
109
110
111
112
113
114
115
116
117
118
119
120
121
122
123
124
125
126
127
128
129
130
131
132
133
134
//导入组件库
import 'package:flutter/material.dart';
//应用入口
void main() => runApp(MyApp());
//应用本身是无状态组件
class MyApp extends StatelessWidget {
// This widget is the root of your application.
@override
Widget build(BuildContext context) {
return MaterialApp(
title: 'Flutter Demo',
//移除导航栏debug样式
debugShowCheckedModeBanner: false,
theme: ThemeData(
// 全局主题
primarySwatch: Colors.pink,
),
// 注册路由表
routes: {
"list_page":(context)=>ListRoute(),
},
//home为应用首页,也是一个Widget
home: MyHomePage(title: 'HomePage'),
);
}
}
//首页--有状态组件
//Stateful widget有两个类,一个StatefulWidget类,一个state类
class MyHomePage extends StatefulWidget {
MyHomePage({Key key, this.title}) : super(key: key);
final String title;
@override
_MyHomePageState createState() => _MyHomePageState();
}

///state的生命周期有initState\didChangeDependencies\dispose
///我们需要的就是在build中堆积布局,然后把数据添加到Widget中,通过setState改变数据
class _MyHomePageState extends State<MyHomePage> {
int _counter = 0;

//自增函数
void _incrementCounter() {
setState(() {
_counter++;
});
}

//PopupMenuItem
SelectView(IconData icon, String text, String id) {
return new PopupMenuItem<String>(
value: id,
child: new Row(
mainAxisAlignment: MainAxisAlignment.spaceEvenly,
children: <Widget>[
new Icon(icon, color: Colors.pink),
new Text(text),
],
)
);
}

//build方法构建UI
@override
Widget build(BuildContext context) {
return Scaffold(
appBar: AppBar(
//标题&是否居中
title: Text(widget.title),
centerTitle: true,
//导航左侧控件
leading: new IconButton(
icon: new Icon(Icons.menu),
onPressed: (){},
),
//导航右侧控件
actions: <Widget>[
// 图标按钮
new IconButton(
icon: new Icon(Icons.search),
onPressed: (){},
),
// 弹出菜单按钮
new PopupMenuButton<String>(
itemBuilder: (BuildContext context) => <PopupMenuItem<String>>[
this.SelectView(Icons.message, '发起群聊', 'A'),
this.SelectView(Icons.group_add, '添加群聊', 'B'),
this.SelectView(Icons.cast_connected, '监测网络', 'C'),
],
onSelected: (String action) {
// 点击选项的时候
switch (action) {
case 'A': break;
case 'B': break;
case 'C': break;
}
},
),
],
),
body: Center(
child: Column(
mainAxisAlignment: MainAxisAlignment.center,
children: <Widget>[
Text(
'You have clicked the button this many times:',
),
Text(
'$_counter',
style: Theme.of(context).textTheme.display1,
),
//按钮
RaisedButton(
child: Text("跳转ListView"),
color: Colors.pink,
highlightColor: Colors.pink[700],
colorBrightness: Brightness.dark,
splashColor: Colors.grey,
shape: RoundedRectangleBorder(borderRadius: BorderRadius.circular(20.0)),
onPressed: (){
Navigator.pushNamed(context, "list_page");
},
),
],
),
),
//右下角悬浮按钮
floatingActionButton: FloatingActionButton(
onPressed: _incrementCounter,
tooltip: 'Increment',
child: Icon(Icons.add),
),
);
}
}

home_page
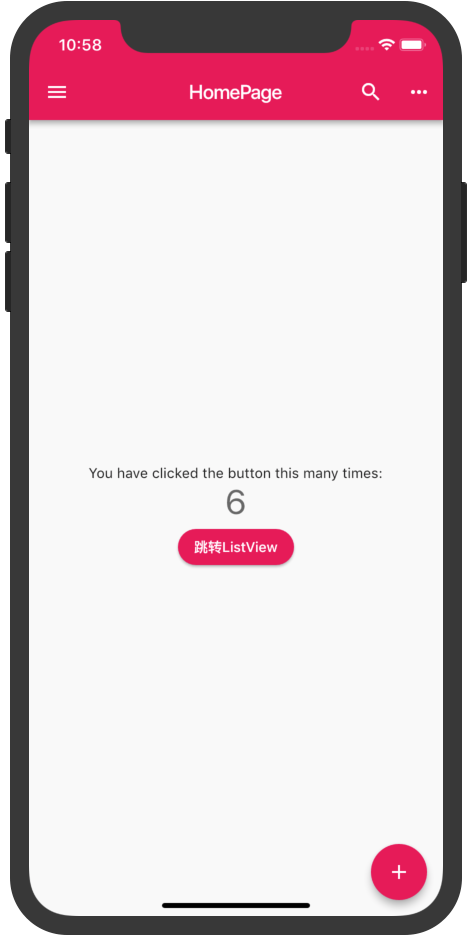
嗯敲完实战DEMO,云里雾里~~不妨将文档的解释敲成代码注释,帮助理解


Flutter布局

常用布局类Widgets

  • Container 常用※※※只有一个子 Widget。默认充满,包含了padding、margin、color、宽高、decoration 等配置。
1
2
3
4
5
6
7
8
9
10
11
12
13
Container(
margin: EdgeInsets.only(left: 10,right: 10,bottom: 30),
padding: EdgeInsets.all(10.0),
height: 120,
width: 500,
///遮罩背景
decoration: new BoxDecoration(
borderRadius: BorderRadius.all(Radius.circular(4.0)),
color: Colors.yellow,
border: new Border.all(color: Colors.black, width: 0.3),
),
child: new Text("Text"),
)
  • Column&Row 常用※※※横竖布局,可以有多个子Widget
1
2
3
4
5
6
//主轴方向,Column的竖向、Row我的横向
mainAxisAlignment: MainAxisAlignment.start,
//默认是最大充满、还是根据child显示最小大小
mainAxisSize: MainAxisSize.max,
//副轴方向,Column的横向、Row我的竖向
crossAxisAlignment :CrossAxisAlignment.center,
  • Expanded 在Column和Row中充满,只有一个子Widget,可以设置flex属性决定比例
  • Padding 只有一个子Widget,常用设置padding
1
new Padding(padding: EdgeInsets.all(10.0))
  • Stack 可以有多个子 Widget。 子Widget堆叠在一起
  • Center 只有一个子 Widget。只用于居中显示,常用于嵌套child,给child设置居中
  • ListView 可以有多个子Widget

    常用呈现类Widgets

  • MaterialApp一般作为APP顶层的主页入口,可配置主题、多语言、路由、标题、应用首页
  • Scaffold一般用户页面的承载Widget,包含appbar、snackbar、drawer等material design的设定
  • Appbar一般用于Scaffold的appbar ,内有标题,二级页面返回按键等,当然不止这些,tabbar等也会需要它
  • Text 显示文本,几乎都会用到,主要是通过style设置TextStyle来设置字体样式等
  • RichText富文本,通过设置TextSpan,可以拼接出富文本场景
  • TextField文本输入框 new TextField(controller: //文本控制器, obscureText: "hint文本");
  • Image 图片加载new FadeInImage.assetNetwork( placeholder: “预览图”, fit: BoxFit.fitWidth, image: “url”);
  • FlatButton按键点击new FlatButton(onPressed: () {},child: new Container());

列表页实战

1
2
3
4
5
6
7
8
9
10
11
12
13
14
15
16
17
18
19
20
21
22
23
24
25
26
27
28
29
30
31
32
33
34
35
36
37
38
39
40
41
42
43
44
45
46
47
48
49
50
51
52
53
54
55
56
57
58
59
60
61
62
63
64
65
66
67
68
69
70
71
72
73
74
75
76
77
78
79
80
81
82
83
84
85
86
87
88
89
90
91
92
93
94
95
96
97
98
99
100
101
102
103
104
105
106
107
108
109
110
111
112
113
114
115
116
117
118
119
120
121
122
123
124
125
126
127
128
129
130
131
132
133
134
135
136
137
138
139
class ListRoute extends StatefulWidget {
@override
_ListRouteState createState() => new _ListRouteState();
}

class _ListRouteState extends State<ListRoute> {
String text = "DefaultText~";

request() async {
await Future.delayed(Duration(seconds: 4));
return "request ok~";
}
//模拟请求
getApiData() async {
String data = await request();
data = "ApiData~";
return data;
}

BottomItem(IconData icon, String text) {
//expanded
return new Expanded(
flex: 1,
child: new Center(
child: new Row(
mainAxisAlignment: MainAxisAlignment.center,
mainAxisSize: MainAxisSize.max,
crossAxisAlignment: CrossAxisAlignment.center,
children: <Widget>[
new Icon(icon, size: 16.0, color: Colors.grey,),
new Padding(padding: new EdgeInsets.only(left: 5.0),),
new Text(text, style: new TextStyle(color: Colors.grey, fontSize: 14.0), overflow: TextOverflow.ellipsis, maxLines: 1,),
],
),
),
);
}

ListViewItem() {
return new Card(
child: new FlatButton(
onPressed: (){print("ListItem clicked");},
child: new Padding(
padding: new EdgeInsets.only(left:0, top: 10, right: 10, bottom: 10),
child: new Column(
mainAxisSize: MainAxisSize.min,
children: <Widget>[
new Container(
alignment: Alignment.topLeft,
margin: new EdgeInsets.only(top: 5.0,bottom: 5.0),
child: new Row(
mainAxisAlignment: MainAxisAlignment.start,
crossAxisAlignment: CrossAxisAlignment.start,
mainAxisSize: MainAxisSize.min,
children: <Widget>[
new FadeInImage.assetNetwork(
placeholder: "images/blackcat_holding.png",
fit: BoxFit.fitWidth,
width: 70,
height: 70,
image: "https://avatars2.githubusercontent.com/u/20411648?s=460&v=4",
),
new Padding(padding: new EdgeInsets.only(left: 10.0)),
new Expanded(
child: new Column(
crossAxisAlignment: CrossAxisAlignment.start,//左对齐
children: <Widget>[
new Text(
"ItemTitle",
style: TextStyle(
color: Colors.grey,
fontSize: 15.0,
fontWeight: FontWeight.bold,
),
maxLines: 1,
overflow: TextOverflow.ellipsis,
),
new Padding(padding: new EdgeInsets.only(top: 3.0)),
new Text(
text*30,
style: TextStyle(
color: Colors.grey,
fontSize: 14.0,
),
maxLines: 3,
overflow: TextOverflow.ellipsis,
),
],
),
),
],
),
),
//padding
new Padding(padding: new EdgeInsets.all(2),),
//bottom item
new Row(
crossAxisAlignment: CrossAxisAlignment.start,
children: <Widget>[
BottomItem(Icons.favorite, "999"),
BottomItem(Icons.pan_tool, "555"),
BottomItem(Icons.grade, "777"),
],
)
],
),
),
),

);
}

@override
void initState() {
super.initState();
//模仿请求数据
getApiData().then((value){
setState(() {
text = value;
});
});
}

@override
Widget build(BuildContext context) {
return Scaffold(
backgroundColor: Colors.pink,
appBar: AppBar(
title: Text("ListView"),
),
body: new ListView.builder(
itemBuilder: (context, index){
return ListViewItem();
},
itemCount: 40,
),
);
}
}

list_page

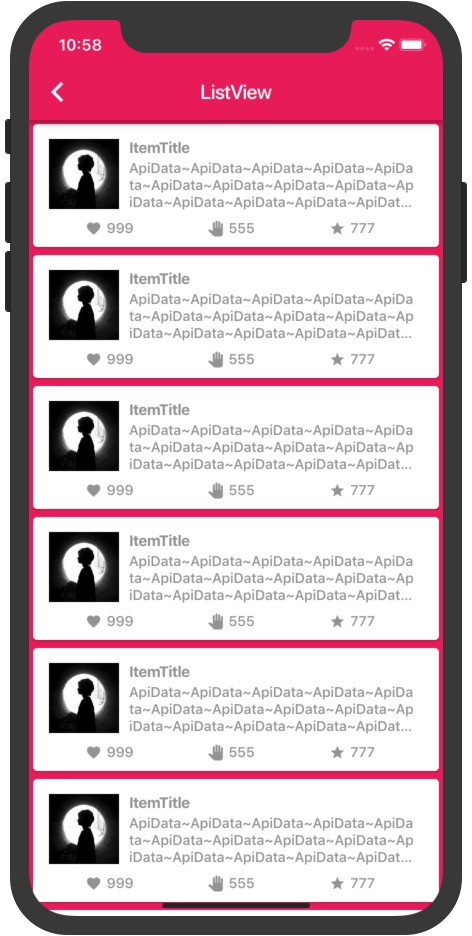
[Flutter Layout]就是要在build中学会用HTML方式堆积Widget,熟练运用Row、Column、Container、Padding等Widget布局UI,相当于iOS中的约束,尝试手写一个自定义ITEM的ListView吧


Thanks for your reading~